
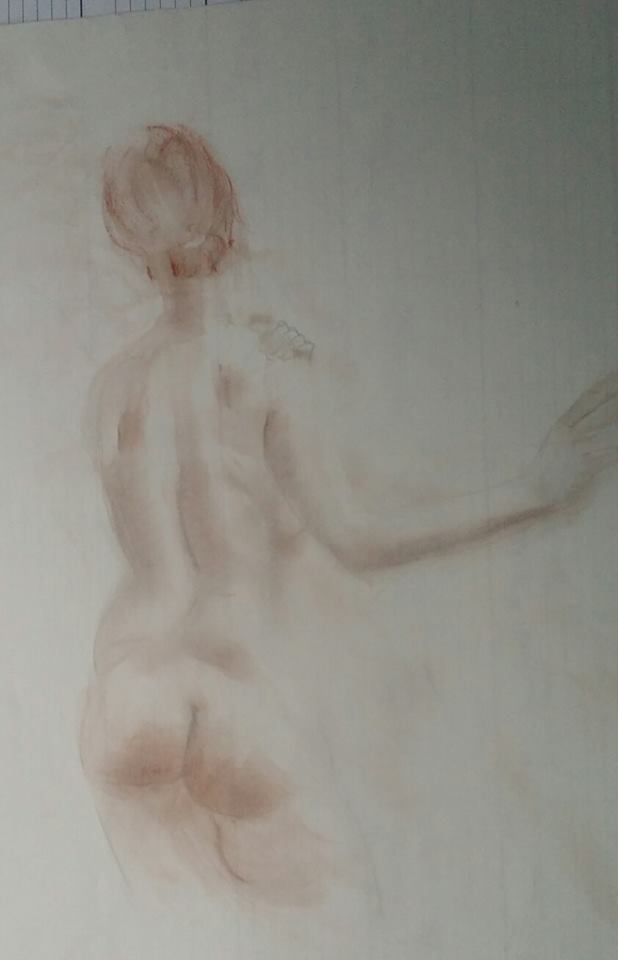
 Lately I have been experimenting with a new technique – drawing with pigment powders and a chamois. It has been difficult and I am only successful for a fraction of my drawings. Here are some examples of my successes so far.


Lately I have been experimenting with a new technique – drawing with pigment powders and a chamois. It has been difficult and I am only successful for a fraction of my drawings. Here are some examples of my successes so far.
“An Artist must have his measuring tools not in his hand but in his eye” – Michelangelo
Why is drawing from photos not good for you?
1. Copying 2 dimensional photos inhibits artists from seeing objects in volume and space.
2. It prevents an artist from judging distance and perspective.
3. The artist does not think and visualize the 3 dimensional nature of an object, but subconsciously regards all objects and shapes 2 dimensionally as seen in photos.
4. By copying flat images, an artist does not make a constructive drawing: there is no comprehensive understanding of objects masses and their spatial relationships.
5. Drawing from photos forces an artist to draw from what he or she sees rather than what one knows.
6. It stops an artist from learning traditional, time proven, step by step drawing methods, which have been perfected by many generations of fine artists starting from the old masters.
7. Working from photos prevents an artist from learning from his or her mistakes and makes it impossible to improve drawing skills by analyzing and fixing those mistakes.
If you get too used to drawing flat images you will most likely limit your ability to learn how to draw proficiently.
– Drawing Art Academy
http://drawingacademy.com/
“If people knew how hard I had to work to gain my mastery it would not seem so wonderful at all” Michaelangelo Buonauroti
I am an avid believer in drawing from life. I encourage artists that are interested in working on improving their drawing skills to attend life drawing sessions, figurative art classes with a live model or portrait sessions with a model.

Pistrucci sept2012 Coast Collective
Yes, I can draw, I can paint and I can sculpt. But in saying that I avoid life drawing like the plague. why? you ask..because I have to show up to it. I have to go somewhere and sit in front of a nude person. Peeking out from my paper only when necessary. I admit it – I’m uncomfortable with the nudity in life drawing – I feel like a peeping tom – seriously am I going to hell for this? Unfortunately two circles, two dots and a smiley face just doesn’t cut it anymore. So in the spirit of open minded abandon I decided to join some of my artist friends for life drawing – Lucky for me because I received the best piece of advice from fellow artist Ann Jarvis– ‘ spend more time looking at the model than at your paper’ . If you look at your paper and only glance at the model you have to rely completely on memory and your imagination – reference by observation of the model is how to draw what you ‘see’.
Observe and draw, repeat.
So, Finally I bit the bullet and went to an intensive 5 full days of life drawing
Working together and sharing creative ideas is an excellent way to expand as an artist but rarely do we actually get the opportunity to get out of the studio. Artists are usually found under rocks or in solitary confinement .
I learned to love to draw again because I was inspired by these amazing artists and their love for art and drawing. At the end of the week I was given a book by Sharron ‘The natural way to draw’ by Nicolaides. My Plan is to complete the excercises in his book over the next several months and to write a blog on my progress.
Below: Whiskey Point Life drawing August 2012


I was definitely humbled by the overwhelming artistic talent in the room. Ann, Kay and Sharron make it look all too easy. I learned so much from these artists and I know I need to keep drawing. It is far to easy to rely on techniques and mediums that you have mastered but it is very important for an artist to continue in all the disciplines – Painting, Drawing and sculpture. I also realized in order to get better you have to challenge yourself and do the very things you need to work on. It is not a sign of weakness not to do something well– it is a sign of weakness NOT to work towards accomplishing it. Life drawing is not for the faint of heart it is for those who want to become professional artists. Challenge yourself – According to Nicolaides = the drawings are not the important part, they are only excercises- it is the training ground to become an artist. That said one of my goals for this coming year : concentrate on life drawing,
OBSERVE, Draw, Repeat…
January2013 -Update : Currently attending several life drawing sessions at coast collective wednesday afternoons 12:30 -3:30 and at Xchanges on wednesday mornings 10-12. I have also attended Uvic 10-1:00, Goward House tuesday afternoons from 1-4pm and Sundays from 12:30-2:30 at Victoria College of Art 1625 Bank st. Xchanges has a Monday evening life drawing session as well. Wednesday mornings there is another life drawing session at Fisgard st. I highly recommend attending a life drawing session and if you are interested other fellow artists will most likely know where to go and when. WARNING — Life drawing is addictive
Life Drawing November2012 –


I am really inspired by this ladies work – I absolutely have to share -check it out! Her website and youtube videos – creative! inspirational and artistic! Sketchbooks are very important to an artists development and if you do not have one I highly recommend building your own as it personalizes your work and inspires you to draw!
sketchbook project campaign – Get yours before April an excellent way to improve your skills as an artist.
FOr more see TrAnsIEnt ArT by Lauren Nash
Here is a project that I thought might interest you as it intrigued me. I sketched a drawing of my sister for a book cover – she loves books and I decided to make her a journal. I have always wanted to put my drawings onto clay and this method allows for an (almost) seemless image. Sketching on clay is difficult but if you sketch onto paper – then transfer the image onto clay and kiln fire the piece you have essentially a permanent record of your drawings.

Here is the method that I have been experimenting with over the last several weeks:
Step One : Make the Ink, photocopy image, Roll out clay slab
In a small container add 3 parts linseed oil to 2 parts mason stain – stir for about 10-15mins.
Let mixture stand overnight for best results

The mason stain is toxic so PLEASE wear rubber gloves and a dust mask for SAFETY.
Photocopy image on a black and white xerox copier – ink jet will not work as it is the toner that is the ingredient that allows the image to transfer. I recomment copying in reverse (negative) so the image will be right side or positive when place down on the clay.
Roll out slab and let sit until leather hard – overnight.
Take a break and start again in the morning….

Step two: list of items required
On a table place 2 pieces of glass – one for your image and one for the ink
2 sponges
In 2 bowls fill with water one large and a smaller container
In the large container of water put a small drop of gum arabic
Have on hand premixed ink, brayer, papertowels, spoon to mix ink, photocopied images and leatherhard clay slab.

As you can see in this photograph the sketch is photocopied reversed so that it will be correct when finished.
Next place about a tablespoon of GUM ARABIC onto the glass set out for the image AND onto the other piece of glass put a line of INK ( STIR first). Smooth out the Gum Arabic over the glass until you have covered the glass in the same approximate area of your image.
Now place the image FACEUP on the glass over the gum arabic. With your fingertips (remember your rubber gloves) gently smooth the gum arabic over top of the image until an even layer all over is applied.
With a papertowel remove the excess gum arabic from around the image and the glass.
Place the brayer over the ink and roll in one direction until the brayer has an even coat of Ink. Now carefully roll onto the image until an even coat is ontop of the image.


Take the wet sponge from the container with the gum arabic and squeeze the water over the image – do not touch the image with the sponge – this is the wash out stage. Now with the other smaller container of just water wet the sponge and ring out until damp. Lightly sponge up the excess water from the image and pat dry over top of the image in the white areas – leaving the darkened areas as much as possible.
DO NOT rub the image as the wet paper will tear – GENTLY pat dry.

Step three: Repeat Inking, gumarabic water sponge washing out, patting dry with clean sponge. cleanup arean with papertowel around the image.You should ink and wash out and pat dry – three times.
Step Four: Place image face down onto clay slab.
This is the most difficult part as you must be careful not to rip the wet paper image.
With your fingers or a tool pull up the corner of the image. You only have one chance at this so be careful when placing the image onto the clay. center it carefully. I use a larger slab and just place it in the middle and then cut my clay to size. It is also important that your clay slab is smooth for best results as a clay slab with pit marks or dents will affect your image transfer. Once the image has been placed onto the clay pat down with a clean damp sponge – being careful that the paper does not move on the clay and smudge the ink image. Gently pat removing air bubbles and making sure it is adhered to the clay. 


Let dry for about 10 – 20 minutes. With the back of a spoon burnish over the entire area of the image. Once the burnishing is complete you can pull up a corner to see how well your image is transferred – if it needs more burnishing place the corner back down and burnish over the area again. Remove the paper in an upward movement – The paper image must be removed prior to firing in the kiln.I have also noticed the longer it is left to dry on the clay it adheres making it difficult to remove leaving behind paper bits. If this occurs try to remove as much as possible but only leave to dry approximately 20 minutes for best results before burnishing.
I have made a book cover as my sister loves books and I want to make her a journal. I cut the clay to the size and leave to dry before placing in the kiln.


Or watch the video by ceramicsartdaily.org
http://ceramicartsdaily.org/ceramic-supplies/ceramic-colorants-ceramic-supplies-2/photo-lithography-on-clay-a-surprisingly-simple-way-to-print-images-on-clay/
Be patient it took me several trys before I got results that I was happy with and still need some more practice with other mason colors and other projects – plates? inspirational messages on cubes ? sculpture?
– Have FUN!! It is endless what you can do with clay!
I have been learning sacred geometry lately – I believe as artists it is important to develop all areas of artistry. Geometry, numbers, lines, negative, positive space plus dimension and form are our creative vices. This is not all of what art is because there exists an unpredictability in art by the addition of thought, creativity and emotion. I recommend reading several books (The Secret Code by Priya Hemenway) on sacred geometry and doing some exercises to learn the methods and apply them to some of your artworks. As a mathematical equation it is square root of 5 plus 1 divided by 2 = 1.618…
How to create a golden rectangle
The most important aspect of ‘the golden mean’ ‘divine proportion’ or sacred geometry is Proportion. Once you begin to train your mind to this concept you will also realize how much there is to learn and accept that you will always be the student and never the master. Here is a great youtube video that decribes the human form and proportion in relation to the divine code titled ‘ golden ration in the human body’ and I encourage you to spend some time, sketch and absorb the valuable information imparted here: 
Image originally found here: http://www.marcus-frings.de/text-nnj.htm
and on this website blog -beautiful proportion:
http://beautifulproportion.blogspot.com/2009/08/beautiful-proportions-golden-ratio-also.html
I am documenting a shortened version here for my own reference —
From the illustration, we can see several occurrences of the golden ratio found in the human body
Sole to navel (1) : Sole to crown (Phi)
Sole to knee : Sole to navel
Navel to shoulder : Navel to crown
Knees to calf muscle : Knees to sole
Navel to mid-thigh : Navel to knees
Navel to sternum or mid-chest : Navel to base of throat
Throat base to temple or brow bone : Throat base to crown
End of calf muscle down to ankle : Calf muscle to sole
Mid-thigh to start of kneecap : Mid-thigh to end of kneecap
Navel to crotch : Navel to mid-thigh
Navel to sternum base : Navel to sternum or mid-chest
Throat base to earlobe : Throat base to top of ear or brow bone
Brow bone to hairline : Brow bone to crown
Nose to chin : Nose to base of throat
Golden proportions in the human body referenced from beautiful proportions blog:


Here is an excellent documentary on Barnstone studios – A great opinion on Art and the master apprentice system.
part one: http://www.youtube.com/watch?v=S0tjNQFha2g
part 2: http://www.youtube.com/watch?v=hKhG7Krfgrk&feature=related
part3: http://www.youtube.com/watch?v=bKewsz3Tr7A&feature=related “we live in a visually illiterate world”
part4: http://www.youtube.com/watch?v=UIoHMd_TvqI&feature=related
part5: http://www.youtube.com/watch?v=zeqszH_L-Ts&NR=1
part6: http://www.youtube.com/watch?v=MeA_6IlljgM&NR=1
part7:http://www.youtube.com/watch?v=A8HrCOcE5lI&NR=1
